
IT Band Syndrome Exercises
IT band syndrome exercises can help reduce pain by improving hip strength, pelvic stability, and lower limb movement. Unlike many knee conditions, these exercises focus on the muscles surrounding the hip because they play an important role in controlling knee alignment during walking and running. Most IT band syndrome exercises are introduced gradually as pain improves and movement becomes more comfortable. Most strengthening exercises are suitable for Stage 1 and Stage 2. Gentle stretching exercises may also be introduced during Stage 3 if they do not increase pain. Perform every exercise within a comfortable range of motion. Stop exercising if sharp pain develops or your symptoms become noticeably worse. Seek a professional medical assessment before continuing your rehabilitation program.
| IT Band Syndrome Stage | Common Symptoms | Exercise Recommendation |
|---|---|---|
| Stage 1: Pain After Activity | Mild pain develops after running, walking, or exercise. Symptoms usually settle with rest. | Begin gentle strengthening and stretching exercises if they do not increase pain. |
| Stage 2: Pain During Activity | Pain develops during exercise and often improves after stopping the activity. | Continue low impact strengthening and flexibility exercises. Avoid activities that reproduce pain. |
| Stage 3: Pain That Limits Activity | Pain interferes with walking, climbing stairs, or daily activities. Tenderness is usually present on the outer side of the knee. | Focus on gentle mobility and stretching exercises. Perform strengthening exercises only if they remain comfortable. |
| Stage 4: Constant Pain | Pain continues during both activity and rest. Daily movement may become difficult. | Avoid self directed exercise until you receive a professional assessment. Exercise should only begin after the underlying cause has been identified. |
Clamshell Exercise
The clamshell exercise strengthens the gluteus medius and other hip abductor muscles, which help stabilize the pelvis during walking and running. Weakness in these muscles is commonly linked to IT band syndrome. Better hip stability helps reduce unnecessary stress reaching the outer side of the knee. This exercise mainly addresses movement problems that contribute to IT band irritation rather than pain inside the knee joint. It is most appropriate during Stage 1 and Stage 2.
Steps:
- Lie on your side on a firm surface.
- Bend both knees to about 45 degrees.
- Stack your hips and knees comfortably.
- Keep your feet together throughout the exercise.
- Tighten your stomach muscles gently.
- Lift your upper knee without moving your pelvis.
- Stop lifting before your hips rotate backward.
- Hold for two seconds.
- Lower your knee slowly.
- Repeat 10 to 15 times.
- Complete 2 to 3 sets.
- Repeat on the opposite side.
Targets: Gluteus medius and other hip abductor muscles.
Helps relieve: Poor hip stability that increases stress on the outer side of the knee.
Common mistake: Rolling the pelvis backward instead of lifting the knee with the hip muscles.
Side Leg Raises
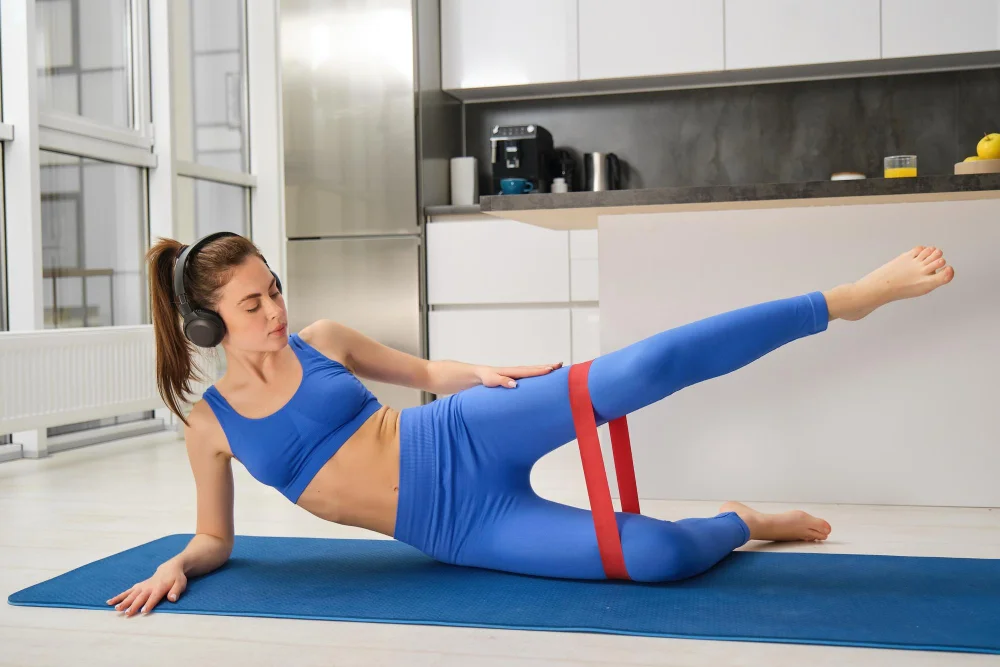
Side leg raises strengthen the hip abductor muscles, including the gluteus medius. These muscles help keep the pelvis level during walking, running, and climbing stairs. Better muscle control improves lower limb alignment and reduces repeated stress on the IT band. This exercise is commonly recommended during Stage 1 and Stage 2.
Steps:
- Lie on your side with both legs straight.
- Bend the lower leg slightly for support.
- Keep the upper leg straight.
- Point your toes forward.
- Tighten your thigh muscles gently.
- Raise the upper leg about 12 inches.
- Keep your hips facing forward.
- Hold for two seconds.
- Lower the leg slowly.
- Repeat 10 to 15 times.
- Complete 2 to 3 sets.
- Repeat on the opposite side.
Targets: Hip abductor muscles, including the gluteus medius.
Helps relieve: Hip weakness that contributes to increased stress on the outer knee.
Common mistake: Lifting the leg too high and allowing the pelvis to rotate backward.
Glute Bridge
The glute bridge strengthens the gluteus maximus, hamstrings, and pelvic stabilizer muscles. These muscles work together to control hip movement during daily activities. Better pelvic stability reduces unnecessary tension transferred to the IT band. This exercise is recommended during Stage 1 and Stage 2. It may also be introduced during Stage 3 if it does not increase pain.
Steps:
- Lie on your back.
- Bend both knees.
- Keep your feet flat on the floor.
- Place your feet hip width apart.
- Rest your arms beside your body.
- Tighten your stomach muscles.
- Press through your heels.
- Lift your hips until your shoulders, hips, and knees align.
- Squeeze your glute muscles.
- Hold for three seconds.
- Lower slowly.
- Repeat 10 to 15 times.
- Complete 2 to 3 sets.
Targets: Gluteus maximus, hamstrings, and pelvic stabilizer muscles.
Helps relieve: Weak hip muscles that increase stress on the outer side of the knee.
Common mistake: Arching the lower back instead of lifting with the glute muscles.
Hip Flexor Stretch
Tight hip flexors can reduce normal hip extension during walking and running. Limited hip movement may increase stress through the pelvis and surrounding muscles. The hip flexor stretch improves flexibility at the front of the hip rather than the knee itself. It is generally appropriate during Stage 1 through Stage 3.
Steps:
- Kneel on a soft surface.
- Place one foot flat in front.
- Keep the front knee above the ankle.
- Keep your back straight.
- Tighten your stomach muscles gently.
- Shift your body forward slowly.
- Feel a gentle stretch at the front of the rear hip.
- Avoid bouncing.
- Hold for 20 to 30 seconds.
- Return slowly.
- Repeat 2 to 3 times.
- Switch sides.
Targets: Hip flexor muscles at the front of the hip.
Helps relieve: Hip tightness that may affect normal pelvic movement.
Common mistake: Leaning forward by bending the lower back instead of moving through the hip.
Standing IT Band Stretch
The standing IT band stretch improves flexibility in the muscles surrounding the IT band, especially the tensor fasciae latae, gluteal muscles, and lateral thigh muscles. Better flexibility around the hip may reduce tension reaching the outer side of the knee during walking and running. This stretch does not lengthen the IT band itself. Instead, it helps improve movement in the surrounding soft tissues. It is generally recommended during Stage 1 and Stage 2. Perform it only if the stretch remains comfortable.
Steps:
- Stand upright with your feet together.
- Cross the affected leg behind your opposite leg.
- Keep both feet flat on the floor.
- Raise the arm on the affected side overhead.
- Lean your upper body toward the opposite side.
- Keep your hips facing forward.
- Continue until you feel a gentle stretch.
- Feel the stretch along the outer hip and thigh.
- Hold for 20 to 30 seconds.
- Return to the starting position slowly.
- Repeat 2 to 3 times.
Targets: Tensor fasciae latae, gluteal muscles, and lateral thigh muscles.
Helps relieve: Tightness around the outer hip that may increase stress on the outer side of the knee.
Common mistake: Twisting the hips instead of leaning sideways.
Foam Rolling
Foam rolling helps reduce tension in the muscles surrounding the IT band rather than the IT band itself. The greatest benefit usually comes from relaxing the tensor fasciae latae, gluteus maximus, and vastus lateralis. Releasing tension in these muscles may reduce stress on the outer side of the knee during movement. Foam rolling is generally appropriate during Stage 1 and Stage 2. Avoid it if the knee is severely inflamed or painful even at rest.
Steps:
- Place a foam roller on a firm surface.
- Lie on your affected side.
- Position the roller below your outer hip.
- Support yourself with your forearm.
- Bend the opposite leg for balance.
- Roll slowly toward the middle of your outer thigh.
- Stop before reaching the outside of the knee.
- Roll back toward the hip slowly.
- Pause over tight muscles for 10 to 15 seconds.
- Continue for 30 to 60 seconds.
- Repeat 2 to 3 times.
Targets: Tensor fasciae latae, gluteus maximus, vastus lateralis, and surrounding outer hip muscles.
Helps relieve: Muscle tightness around the hip and outer thigh that may increase IT band irritation.
Common mistake: Rolling directly over the outside of the knee instead of the surrounding muscles.
Hamstring Stretch
Tight hamstrings can reduce normal hip movement and alter lower limb mechanics during walking and running. Better hamstring flexibility allows the hip and pelvis to move more naturally. This reduces unnecessary stress transferred through the lower limb during repetitive activities. The hamstring stretch supports movement quality rather than treating the IT band directly. It is generally recommended during Stage 1 through Stage 3.
Steps:
- Sit on the floor with both legs extended.
- Bend one knee comfortably.
- Place that foot against your opposite thigh.
- Keep the other leg straight.
- Sit up tall.
- Lean forward from your hips.
- Reach toward your foot comfortably.
- Stop when you feel a gentle stretch.
- Hold for 20 to 30 seconds.
- Return slowly.
- Repeat 2 to 3 times.
- Switch legs.
Targets: Hamstring muscles at the back of the thigh.
Helps relieve: Tightness behind the thigh that may affect hip movement and pelvic mechanics.
Common mistake: Bouncing during the stretch or forcing the movement beyond a comfortable range.
IT Band Syndrome Exercises to Avoid
Not every exercise is helpful during recovery. Some movements place repeated stress on the iliotibial band and may increase irritation instead of improving it. Avoiding these activities during the painful stages gives the irritated tissue more time to recover. Once symptoms improve, some exercises may be reintroduced gradually under professional guidance. Even when performing chiropractic exercises for knee pain, movements should never increase pain on the outer side of the knee.
Deep Knee Bends
Deep knee bends are often best avoided during the painful stages of IT band syndrome. Bending the knee beyond a comfortable range increases compression where the IT band passes the outside of the knee. That repeated pressure may increase irritation and delay recovery.
Movements such as deep bodyweight squats, deep lunges, and repeated squat exercises commonly place the knee into this position. Many people continue these exercises because they do not feel pain immediately. The discomfort often develops later or becomes noticeable after several repetitions.
A safer approach is limiting the depth of the movement until symptoms improve. Partial squats usually place less stress on the irritated tissues. Gradually increasing knee bend is often better than forcing a full range too early. Deep knee bends are usually avoided during Stage 2, Stage 3, and Stage 4. They may be reintroduced during later rehabilitation once they can be performed without pain.
Running Hills
Running uphill or downhill often increases the workload placed on the hip, knee, and iliotibial band. Both surfaces can aggravate IT band syndrome, although downhill running usually places greater stress on the outer side of the knee.
Many runners stop sprinting but continue hill training. That mistake can keep symptoms returning even when overall running distance has been reduced. Every uphill and downhill stride increases repetitive loading through the same painful area.
Flat, even surfaces are usually better tolerated during the early stages of recovery. Hills should only be reintroduced after running comfortably on level ground without symptoms returning afterward. Hill running is generally avoided during Stage 2, Stage 3, and Stage 4. Returning too early may slow recovery and increase the likelihood of another flare up.
High Impact Jumping Exercises
Jumping exercises generate high, repetitive forces through the knee in a short period of time, which can overwhelm an already irritated IT band. Box jumps, plyometric drills, and repeated landing based movements fall into this category.
The concern is not simply impact, but the speed at which force travels through the knee during landing. Unlike a controlled squat, jumping does not allow the body to gradually absorb load, increasing the likelihood of reproducing pain at the lateral knee.
Athletes recovering from IT band syndrome sometimes reintroduce jumping too early, assuming reduced pain during walking means the tissue is ready for higher demand training. This assumption is often responsible for renewed symptoms weeks after an initial improvement, since walking and jumping place fundamentally different loads on the same structures.
Get a summary of this article with your favorite AI: